Are you trying to figure out exactly how many of your uniques are coming from your own internal traffic? Well wonder no more with Google Analytics Filters!
I wish someone had give me this tip a few years back when I first started using Google for their outstanding (and free!) analytics software. I can’t imagine anyone who has their own website doesn’t already know about GAnalytics, but in the off chance: check it out here.
This article will explain how to set up a “filter” that can be applied to any of the sites that you track through Google Analytics. It is especially helpful for people who suspect that a significant amount of their traffic is actually coming from internal usage – like myself. When I add or try out new features and plugins to whatsacookie.com, I will often do a ton of refreshes to various pages to see how it looks. I always knew that would artificially inflate my Analytics, and sure enough it did.
However, Google has a way for your to filter out the data that is coming from a certain public IP. For those of you not familiar with IP addresses, a quick overview…even though every computer on your internal network has its own IP address (i.e. 192.168.1.108), all of your traffic that goes out to the rest of the public Internet is under a single IP. Generally speaking, if a physical location only has one internet connection, then every computer has the same public IP address.
So if you own a small sales company and you have 10 different computers that all connect to the internet, to the rest of the public internet they are all indistinguishable in terms of their IP. So in order to filter out the traffic that comes from your staff, we’ll need to find out what that public IP address is.
The easiest way I have found is to go to IPchicken. Right in bold blue number on the top of the page is your public IP address (it should look like #.#.#.#, or 13.234.42.1 – don’t worry if yours looks weird, they are all different). If you aren’t sure if everybody has the same one, then go to a few other computers on your network and go to the site to double check.
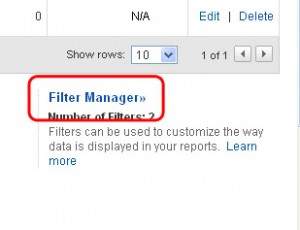
Once you have your IP address, write it down unless you can remember it (it has to be exact). Then log in to your Analytics account like usual, but don’t click through into the actual data. On the Account listing page, you should see the following towards the bottom right:

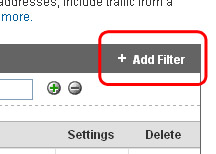
Click on the Filter Manager link as is circled above. Once in, you’ll want to add a new filter by clicking on the “+Add Filter” button, as seen below:

Once in the Add a Filter page, you’ll need to setup the filter so that it EXCLUDES your IP. Give your filter a name so you can identify it from any other filters in the future, such as “Office” or something. Then with “predefined filters” selected, set it up so that is says “Exclude Traffic from the following IP addresses that are equal to:”
 From there, you’ll see four boxes popup up underneath where you need to enter the IP that you were supposed to write down earlier. If you ignored my advice, just open up a new window and find out what it is again. Remember not to enter the . (dots) in between each number (you can also enter an IP address range here if you wish, but most people won’t use that feature).
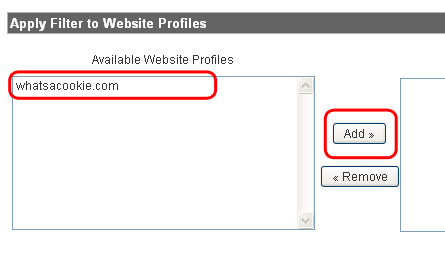
Now, make sure that you enable the filter for your site. Otherwise your filter will just sit there and won’t be doing anything.
 You can add multiple filters too! For example, I have one for my office and one for my home. That way if I’m doing work at either location the visits won’t pollute my statistics.
Other notable things to consider when using filters:
Analytics Filters work in the background, blocking the data from ever arriving in your results. When they are enabled there really isn’t anything that reminds you that they are turned on, and you can’t just flip them on and off. So if you see a sudden dip in traffic, you’ll know why. So the lesson here is that Filters literally filter everything when they are turned on, its not just a customized view of your results.
It also should be noted that once you have your filter turned on, it ignores all traffic from that point on. It will not retroactively filter those results out of any history you have already in your Analytics account. That is unfortunate, but the sooner you start looking at your traffic honestly, the better job you can do of judging the success or failure of new campaigns and other changes!
UPDATE!
My friend Cale from web180.com brought up an excellent point…some internet providers use DHCP even for their customers. That essentially means that one day you will have a certain IP address, and the next it will be completely different with no relation to the first. If that is the case, your new Google Analytics filters will be rendered practically useless.
To figure out if you have an internet provider that is using DHCP, check your public IP for a few days to see if it stays consistent. If it does, chances are you’ll be safe. However, you may want to check in every now and then to see if they switch it on you – unless you have a business with a T1 or more, they most likely wouldn’t notify you of any changes.
